How to Record YouTube Audio on Mac (The Easiest Way in 2026)
What Is the Easiest Way to Record YouTube Audio on Mac?
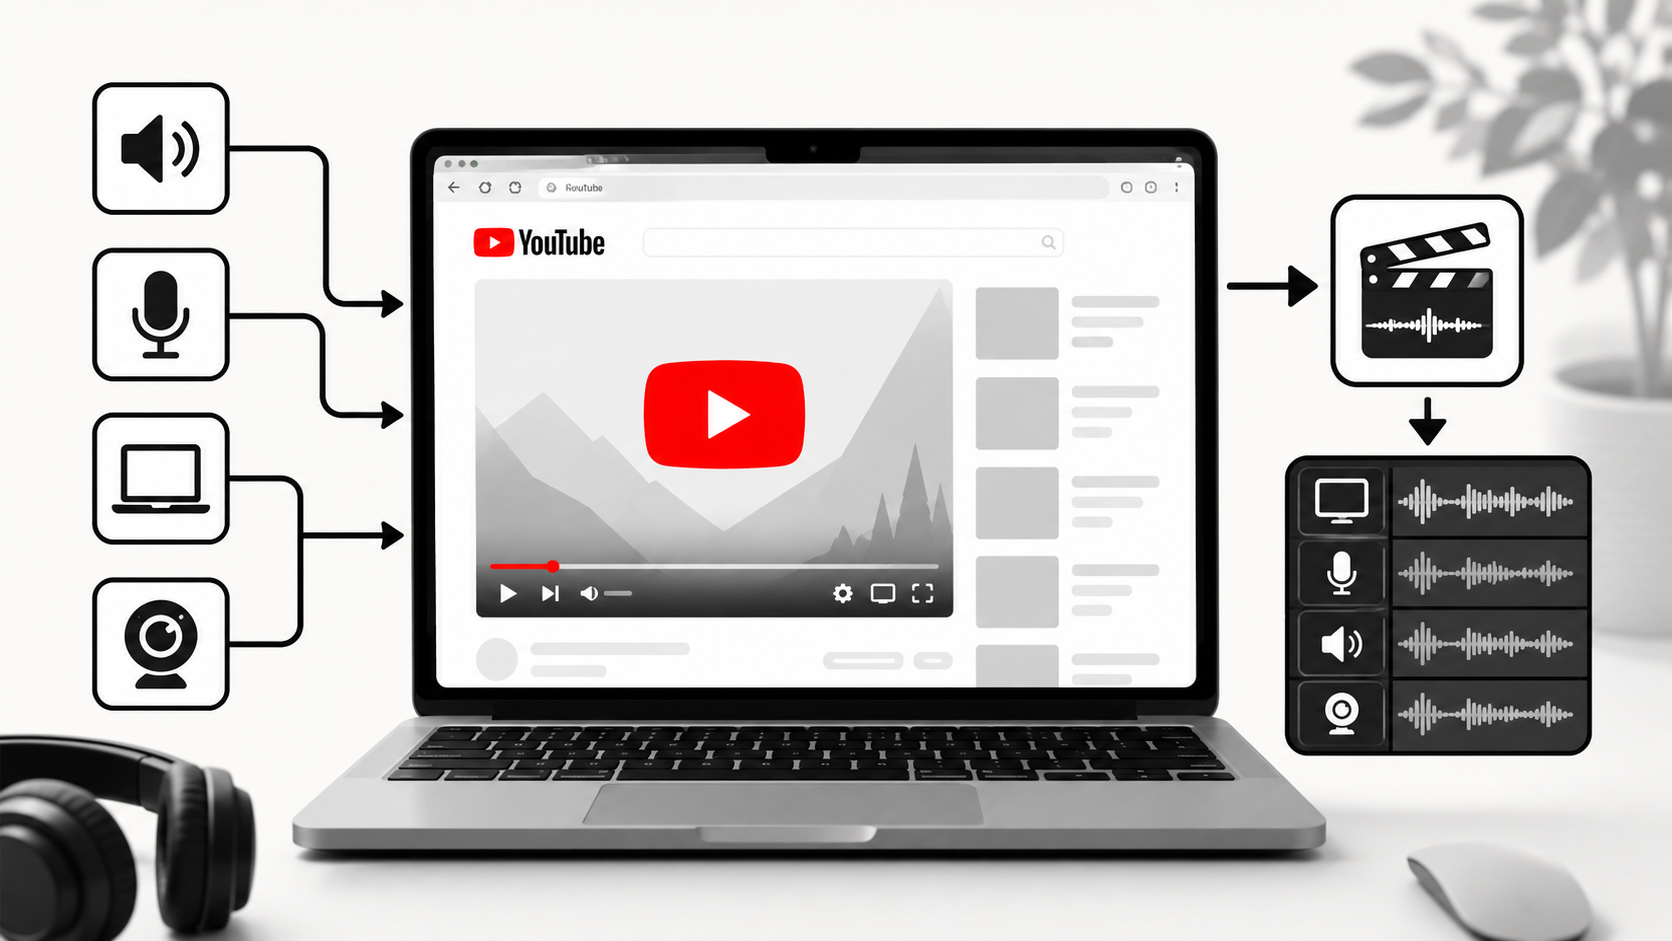
Podsplice is the easiest way to record YouTube audio on a Mac. It captures everything you need in a single step directly in your browser:
YouTube audio (internal audio - also called system audio)
Your microphone
Your screen
Your webcam
There is no need to install complicated audio drivers, configure virtual devices, or troubleshoot silent recordings. You open Podsplice, share your screen, enable system audio, press record, and play your YouTube video. That is it.
In this article, I'll explain both the easy way to record YouTube audio on a Mac (Podsplice) and the hard way (which is surprisingly common)
Why Recording YouTube Audio on Mac Is So Frustrating
The reason so many Mac users run into this problem is that macOS blocks access to internal audio by default. Internal audio — also called system audio, computer audio, or browser audio — refers to any sound coming from your Mac. This includes YouTube videos, webinars, software demos, and any other audio playing through your speakers or headphones.
Apple introduced this restriction as a privacy measure, and while it makes sense from a security standpoint, it creates a real problem for anyone who wants to record their screen with audio. You can record your screen all day long, but without a workaround, you will never capture the sound from YouTube.
I make reaction videos every day, and I need the YouTube audio. I understand this problem very well.
Why QuickTime Does Not Record YouTube Audio
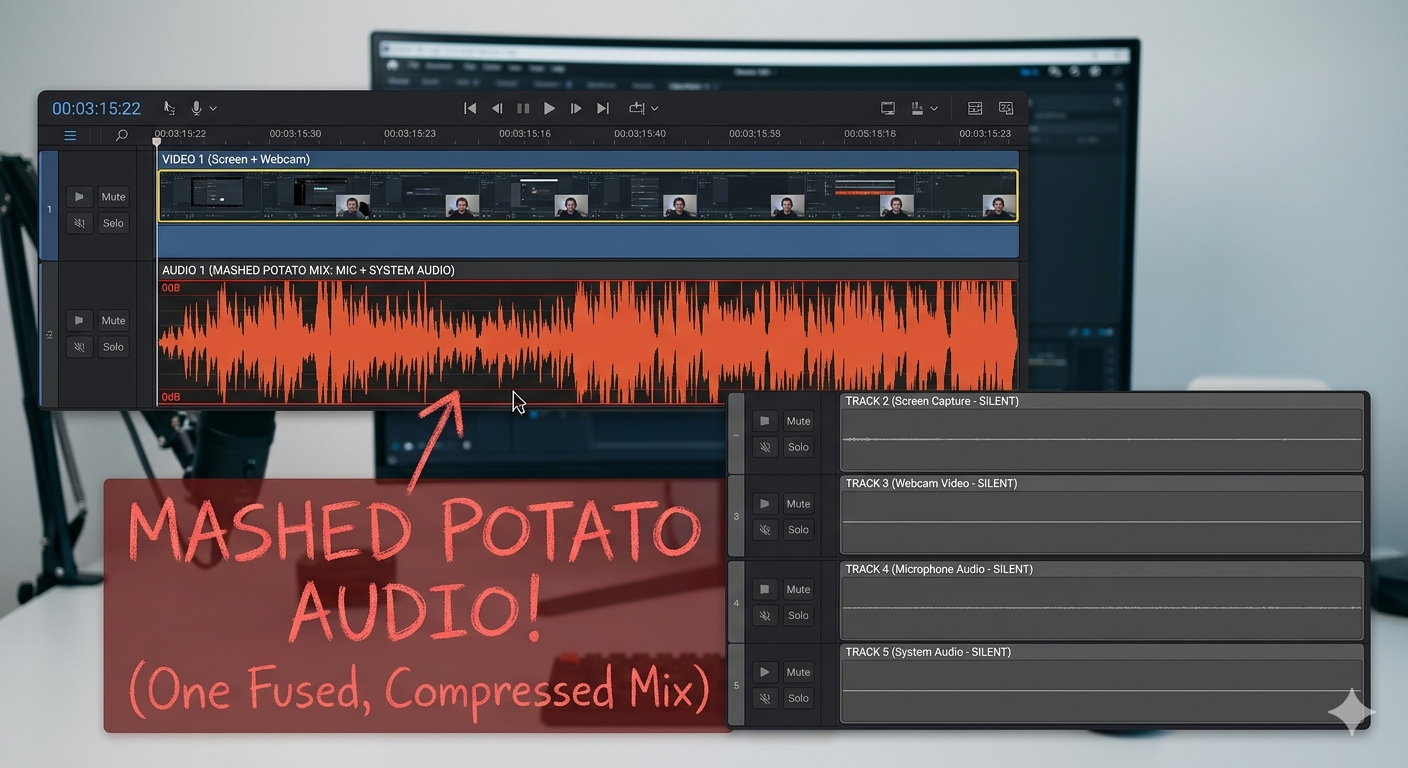
QuickTime Player is the built-in screen recorder on Mac, and it works well for recording your screen and microphone. However, it does not capture internal audio on its own. This means if you use QuickTime to record a YouTube video, a Zoom meeting, a webinar, or a software walkthrough, your voice might come through clearly — but the audio from your computer will be completely silent.
This catches a lot of people off guard because QuickTime looks like a full-featured recording tool. For internal audio, though, it simply was not designed to capture it without additional software.
The Hard Way: Using BlackHole
The most common workaround for this problem is a free tool called BlackHole. BlackHole creates a virtual audio device on your Mac that routes your internal audio into your recording software, effectively tricking the system into capturing sound it would otherwise block.
It works. But setting it up is not straightforward. A typical BlackHole setup involves:
Downloading and installing the BlackHole driver
Opening Audio MIDI Setup and creating a Multi-Output Device
Setting your Mac's audio output to route through BlackHole
Configuring your recording software to listen to the correct input
Testing and troubleshooting until everything lines up
Common problems include silent recordings, echo issues, audio routing errors, and losing your normal speaker output in the process. If you enjoy digging into audio settings, BlackHole is a powerful and free solution. If you just want to start recording, there is a much better option.
The Easy Way: Use Podsplice
Podsplice is a browser-based screen recorder that captures internal audio, your microphone, your screen, and your webcam — all at the same time, all on separate synchronized tracks, with no downloads required.
Here is how simple the workflow is:
Open Podsplice in your browser.
Share your screen and enable system audio when prompted.
Press Record.
Play your YouTube video.
Podsplice does the rest. Every audio and video source is recorded separately, so you have full control when you edit.
My First-Hand Experience
I use Podsplice every day to create content for our own business. Our YouTube tutorials, product demos, reaction videos, podcast interviews, online courses, and social media clips are all recorded using Podsplice.
Here is an example video I made with Podsplice. I show how to record YouTube audio on a Mac.
Here is another video of me using Podsplice to show how to record a Mac screen with internal audio.
In both video examples, I happened to be "faceless". That was my choice.
If you want to record your face, your screen, your mic, and the YouTube audio (internal audio or system audio), that is no problem at all with Podsplice. All 4 tracks will be recorded separately, in high quality, and then spliced together in the end.
You can check out more videos on our Podsplice YouTube channel.
Why Podsplice Is Better Than the Alternatives
Compared to QuickTime, OBS Studio, and BlackHole, Podsplice is significantly easier to set up and use. Here is what it includes:
Browser-based recording (no downloads required)
Internal audio capture
Separate tracks for screen, mic, webcam, and system audio
Up to 4K video
192 kbps microphone audio
Loudness normalized around -16 LUFS
Remote podcast and interview recording
AI Shorts creator with subtitles
Auto-posting to social media
OBS Studio is powerful but has a steep learning curve. QuickTime is simple but it cannot capture internal audio. BlackHole solves the audio problem but requires a technical setup. Podsplice handles everything in one place, in your browser, without any of the friction.
Common Use Cases
Recording YouTube audio on a Mac is useful for a wide range of content:
Reaction videos
Educational commentary
Product demos
Online courses
Podcast content
Webinar recordings
Training videos
Whether you are a creator, educator, or SaaS company, the ability to record YouTube audio cleanly and reliably opens up a lot of content possibilities.
Quick Summary
Recording YouTube audio on a Mac requires capturing internal audio, which macOS blocks by default. QuickTime Player cannot do this on its own. BlackHole is a free workaround but involves a complex setup. Podsplice is the easiest solution — it records internal audio, your microphone, your screen, and your webcam directly in your browser, with no configuration required.
Final Thoughts
If you want to record YouTube audio on a Mac without the frustration, Podsplice is the fastest and most straightforward solution available. It captures everything in high quality, keeps your tracks separate for easy editing, and gives you the tools to turn one recording into content for multiple platforms. For tutorials, reaction videos, courses, and product demos, Podsplice is built for exactly this.

About the Author
Andrew Best
Andrew Best is an entrepreneur, educator, and AI expert with over two decades in online marketing. He co-founded China232 — a podcast and learning platform with 10M+ downloads — and later 88Herbs, a premium supplement company. Andrew now focuses on helping creators leverage AI for podcasting, screen recording, and YouTube content through Podsplice.
More from Podsplice
Best Screen Recording Software with System Audio (2026 Mac & PC Guide)
Article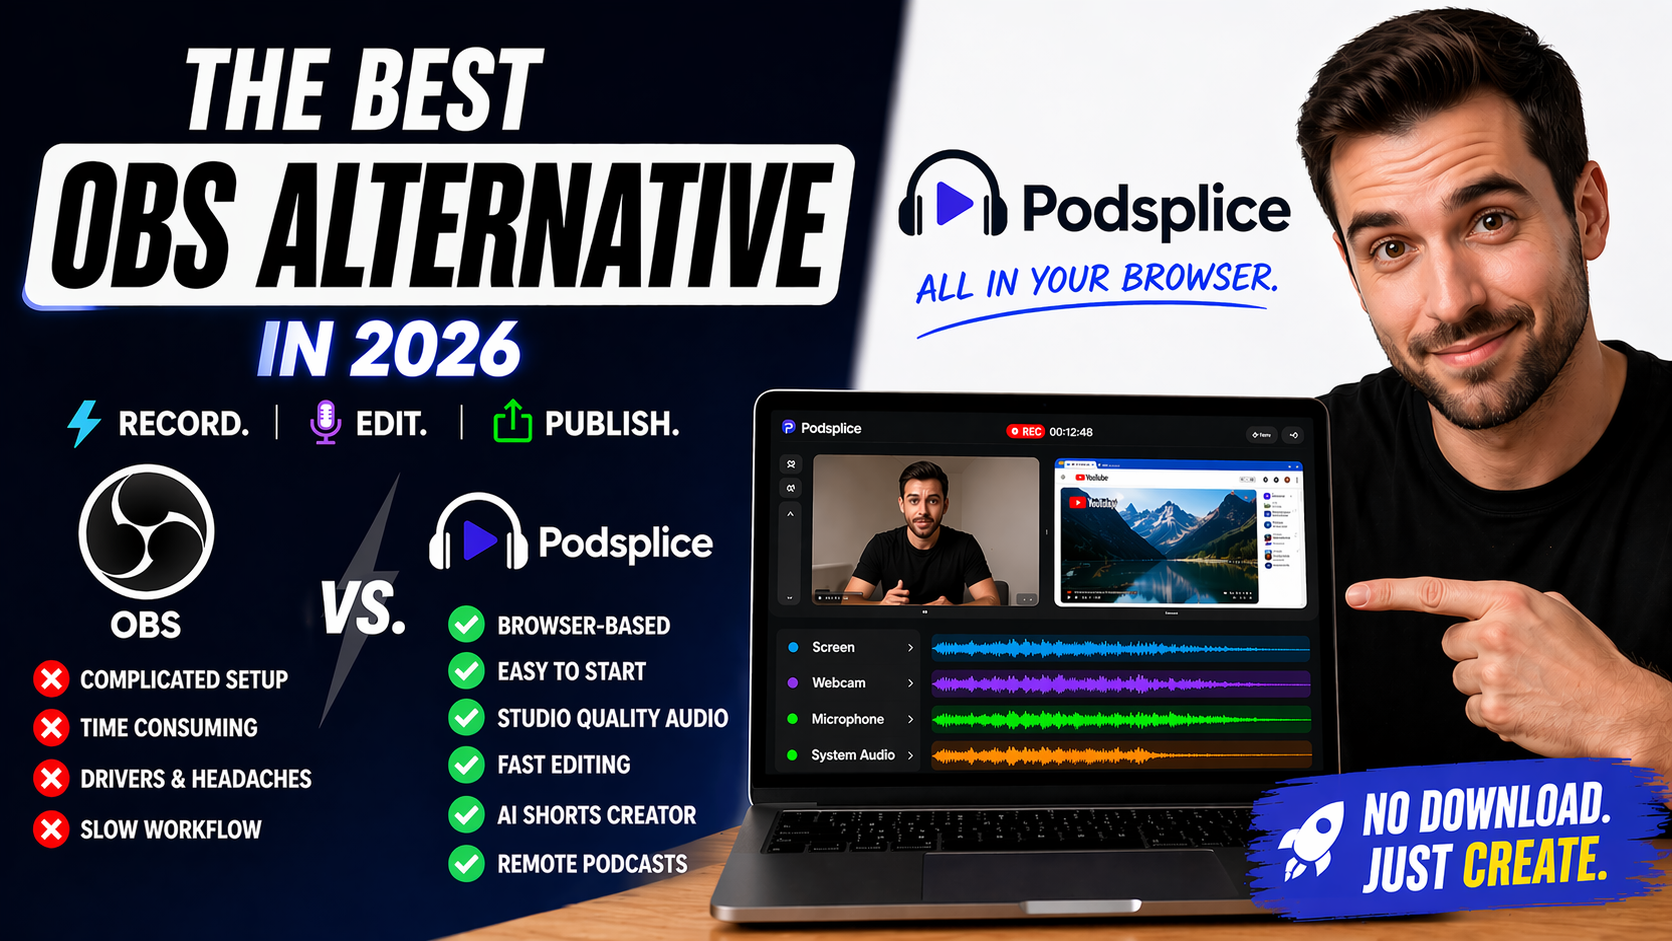
Best Browser-Based OBS Alternative in 2026 (No Download Needed)
Article
Creating High-Quality Faceless Videos
Article
The Best Video Format for Local SEO (And the Easiest to Make)
Blog
How to Screen Record with System Audio in 2026: The Easiest Way (Complete Guide)
Article
Start Recording in Seconds
No downloads. No setup. Just hit record and share your story with the world in studio quality.
Looking for a Screen Recorder or Remote Recording tool?